
Zapier data entry automation

What is Zapier?
Zapier is a no-code solution that enables two or more apps to talk to each other to create workflows. For example, Zapier can connect your online Google Forum to Slack so that whenever someone submits a forum, you can see the submission via Slack. Amongst the competitors like make.com and avocado, Zapier truly shines because it is compatible with 5000 apps and it’s 100% code-free if you want it to be.
Zapier integration with Salesforce
Zapier can be a handy tool if you want to automate data entry for your CRM such as Salesforce, Hubspot, or Pipedrive. Today, we are going to showcase how you can set up a Zapier integration with Salesforce CRM. More specifically, we are going to walk you through how to set up a workflow to automatically add an inbound Gmail lead to your Salesforce CRM using Zapier. You will extract the first name, last name, company name, and phone number of Gmail inbound leads and then store that data in Salesforce CRM.
After this tutorial, you will also gain confidence to explore similar workflow setups such as Gmail with Hubspot or Outlook with Pipedrive for example.
Prerequisites:
- A Salesforce CRM account.
- A Gmail account.
- A Zapier account.
Additionally, we recommend using the following email template to stay consistent with the test results and the corresponding screenshots we have attached. Just send the following message from any email account to the Gmail account that you are planning on using for this workflow.
Email Template:
hi,
I am [Your first name]. I'd like to get to know about company x. Give me a call at 605-785-1497.
[Your first name]
Step-by-step Guide:
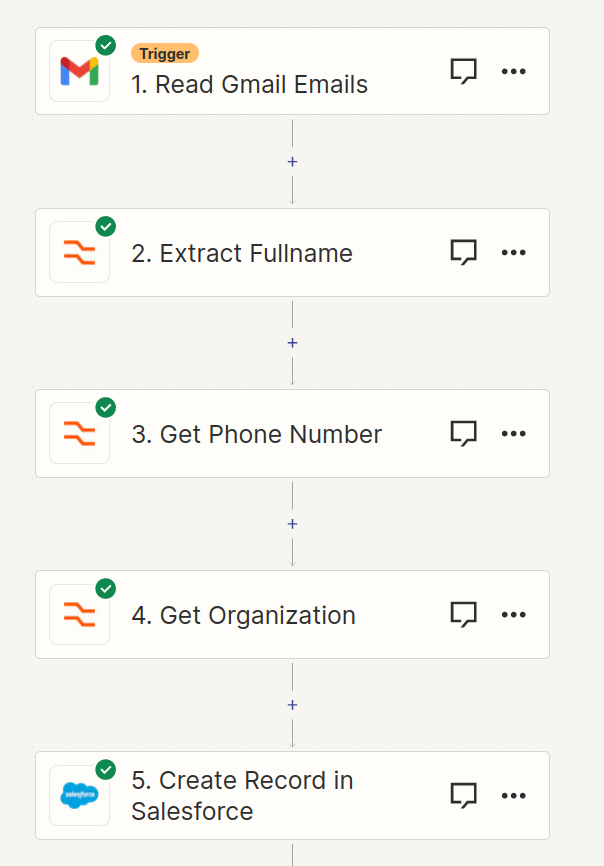
In Zapier, a workflow that consists of two or more apps is called a Zap. A Zap includes a trigger that acts as a switch to start the workflow as well as one or more actions. This will be more clear as we go further.
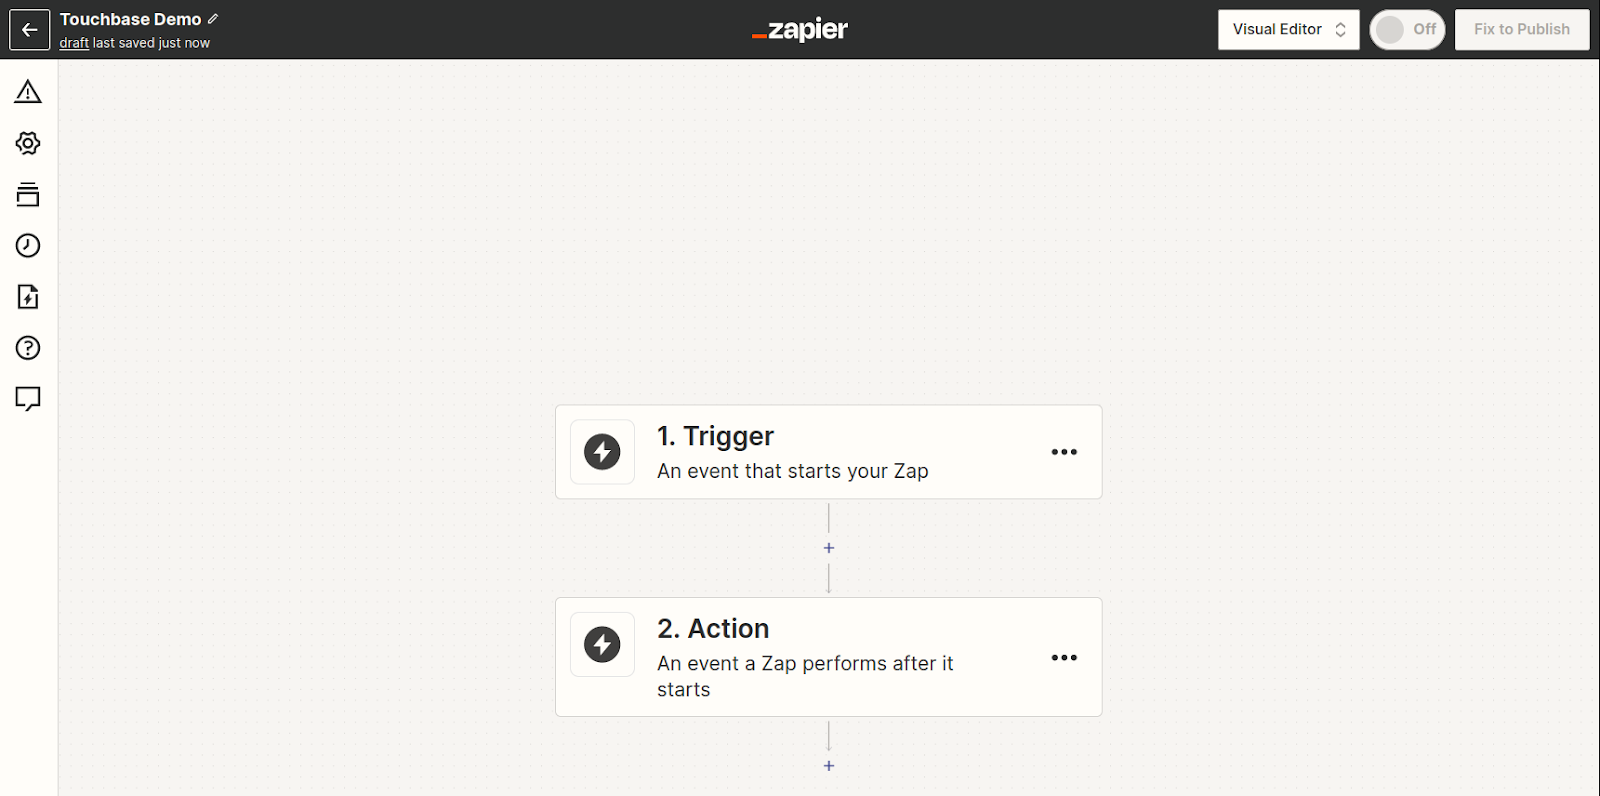
Step 1: Setting up your Zap in Zapier
- Log into your Zapier account.
- Click on "Make a Zap" in the top right corner.
- Name your Zap for reference.
Now you should get the following screen.
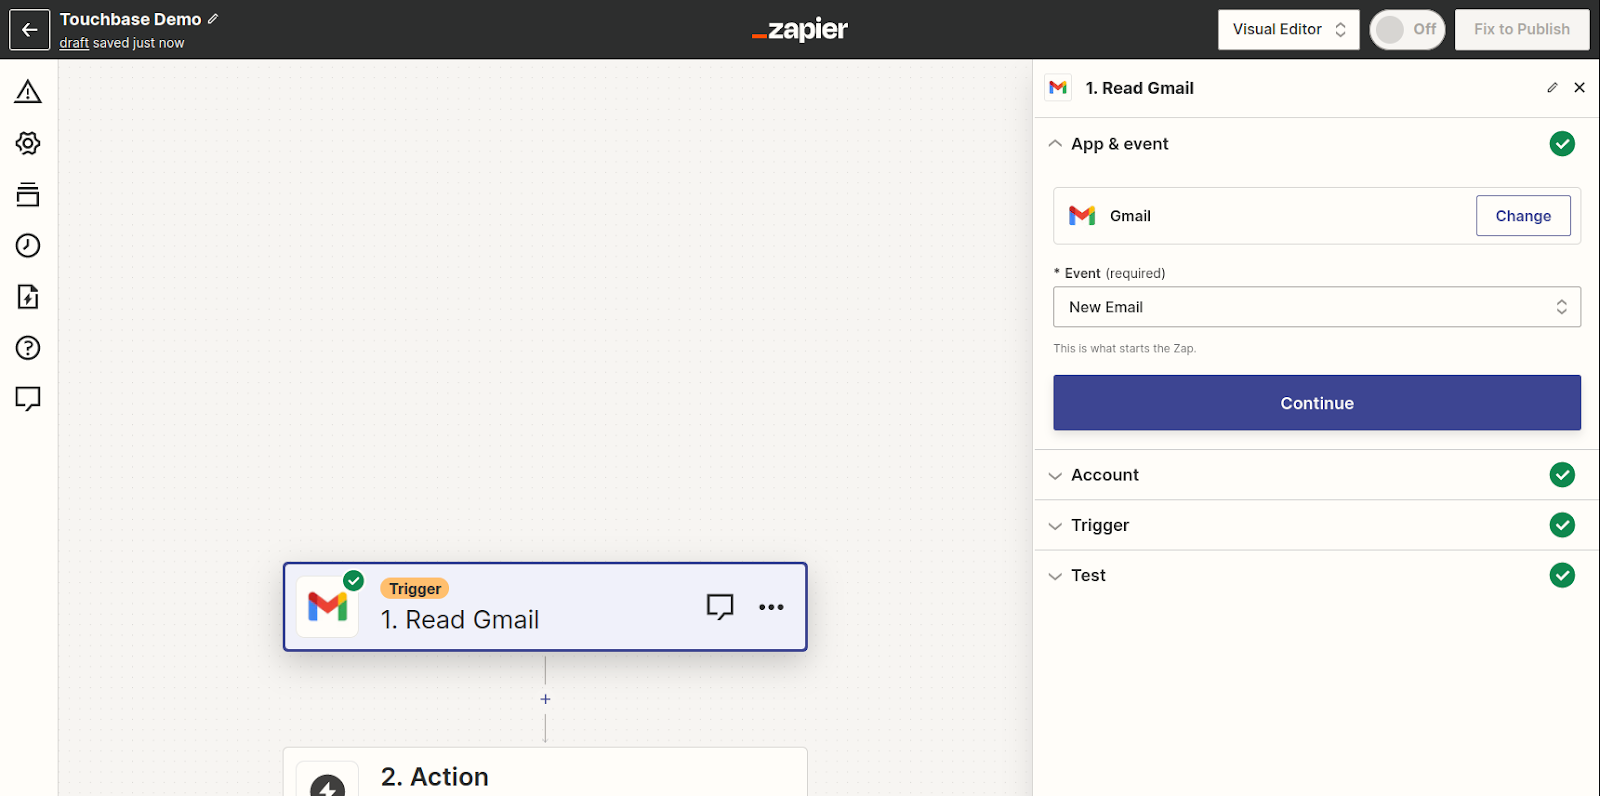
Step 2: Setting up the Gmail Trigger
- For the "Trigger", search for "Gmail".
- Choose "Gmail" as your Trigger App.
- Choose “New Email” as the event.
- Click "Continue".
- Connect your Gmail account by following the on-screen instructions.
- Leave Labels/ Mailbox as the default values.
- Then, run a test by sending a sample email to the email you just connected
This is what it would look like after the second step
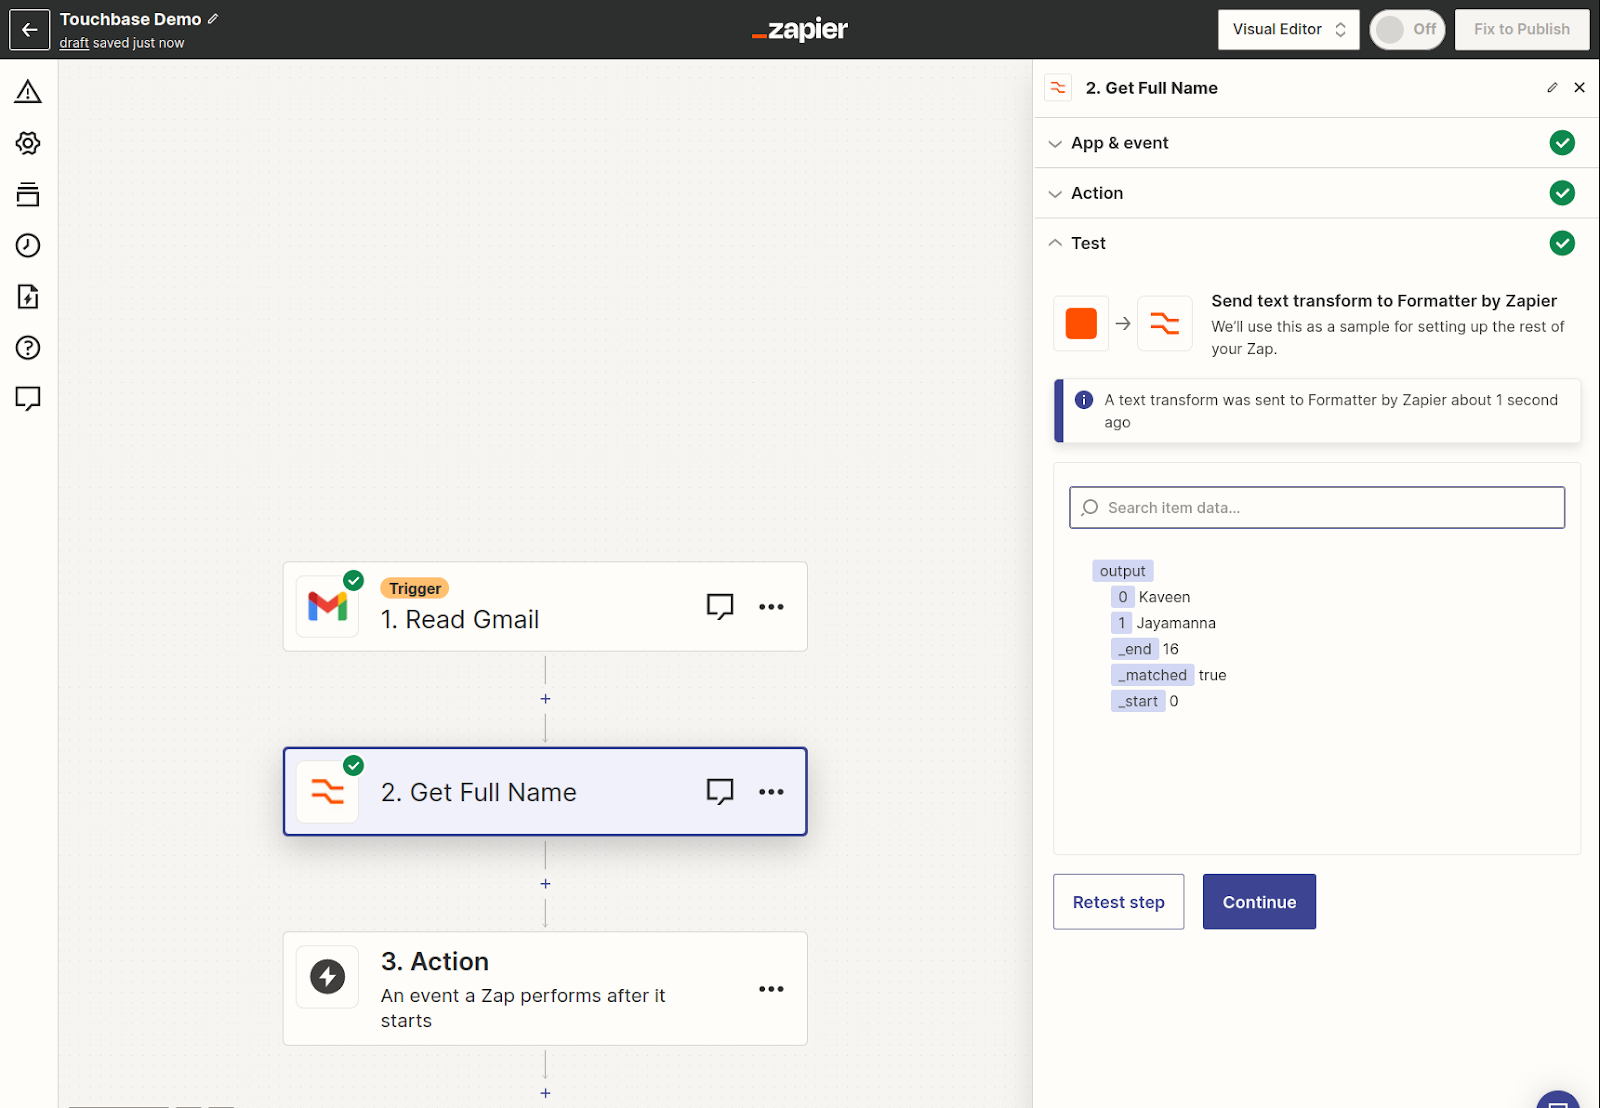
Step 3: Extracting Details from the Email
- After setting up the Gmail trigger, click on the little + sign to add a new step to your workflow and choose "Formatter" by Zapier as the next action app.
- You can call this app whatever you want to but we will call it “Get Fullname”.
- For the action event, select "Text".
- In the "Transform" section, select "Extract Pattern".
- Since Zapier does not fully understand where you can find the name of the lead, we have to pinpoint exactly where it is located. When we receive a Gmail email from a lead, Gmail includes the first name and the last of the person who is registered on that email. Therefore, for the Input field, select and Choose “From Name Firstname Lastname” which is read through the Gmail integration above.
- For the pattern, copy and paste the following pattern; ^([A-Za-z]+)\s([A-Za-z]+)$
- Leave the rest of the fields with the default values and click continue.
- Run the test and make sure you get a similar output as below. Notice that if the test is successful “output” will have two entries where 0 is for the first name and 1 is for the last name.
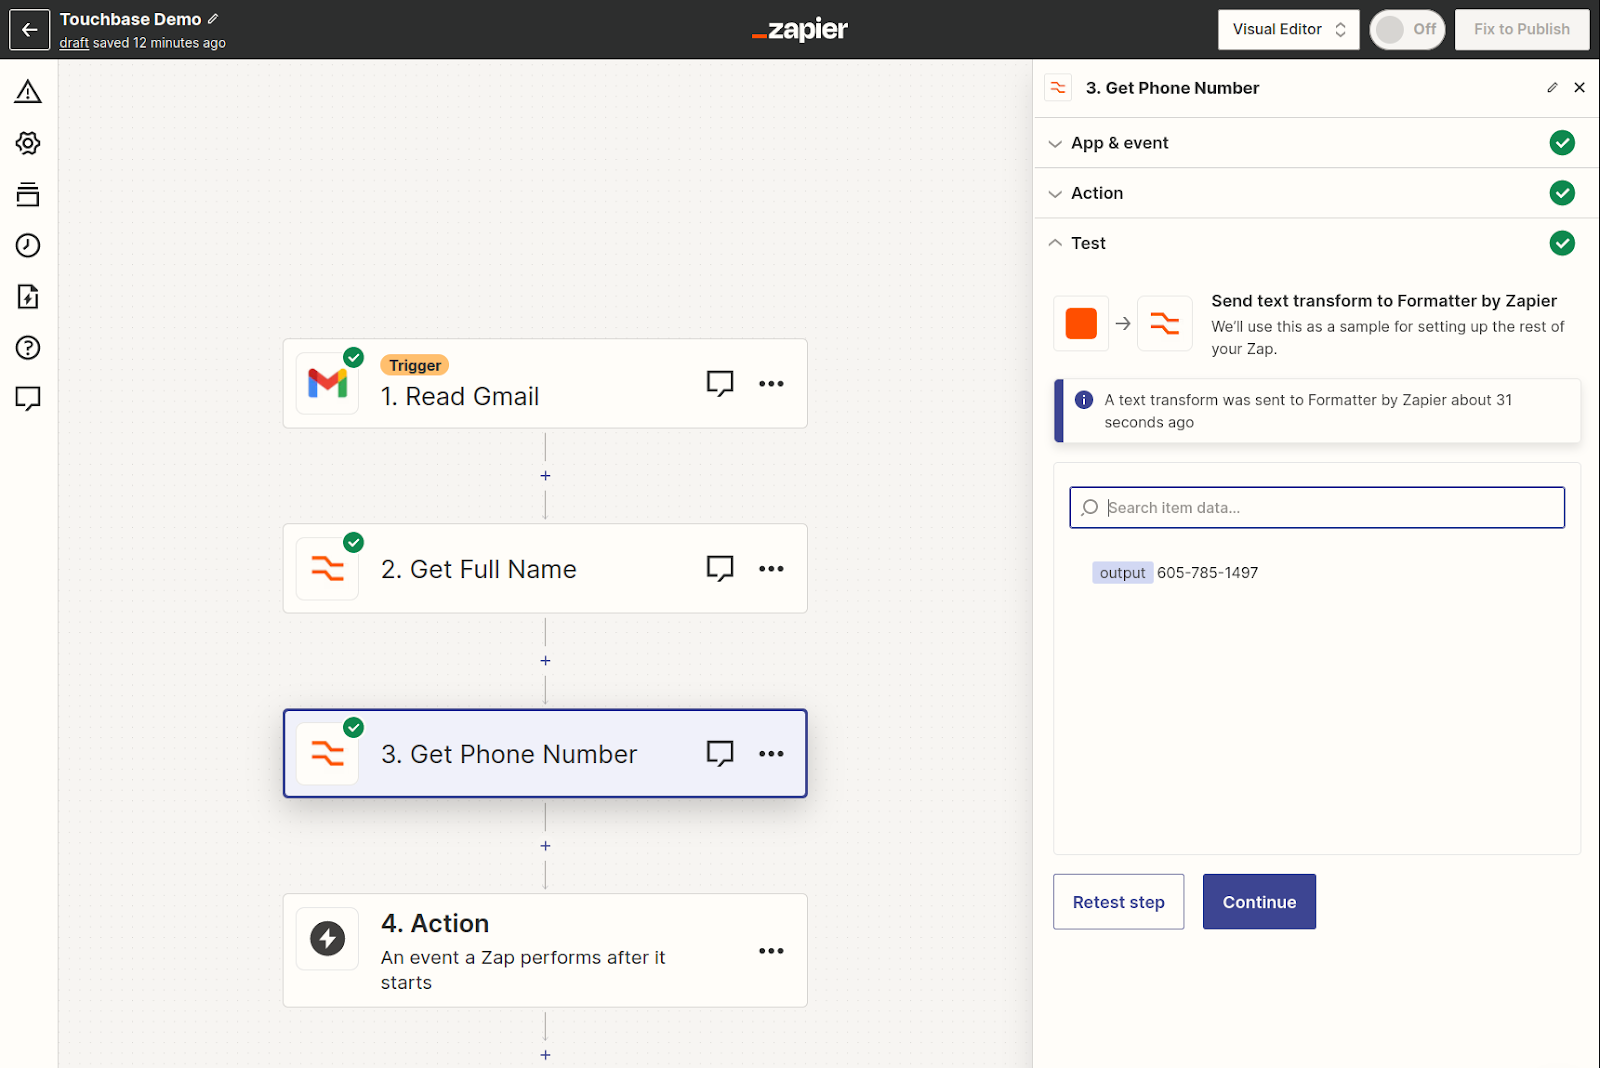
Step 4: Get the Phone Number
- Again click on the little + sign to add a new step to your workflow and choose "Formatter" by Zapier as the next action app.
- You can call this app whatever you want to but we will call it “Get Phone Number”.
- For the action event, select "Text".
- In the "Transform" section, select "Extract Phone Number".
- For the input, select “Body Plain” from the Read Gmail step and click continue.
- Then, go ahead and run the test and see if you get a similar output.
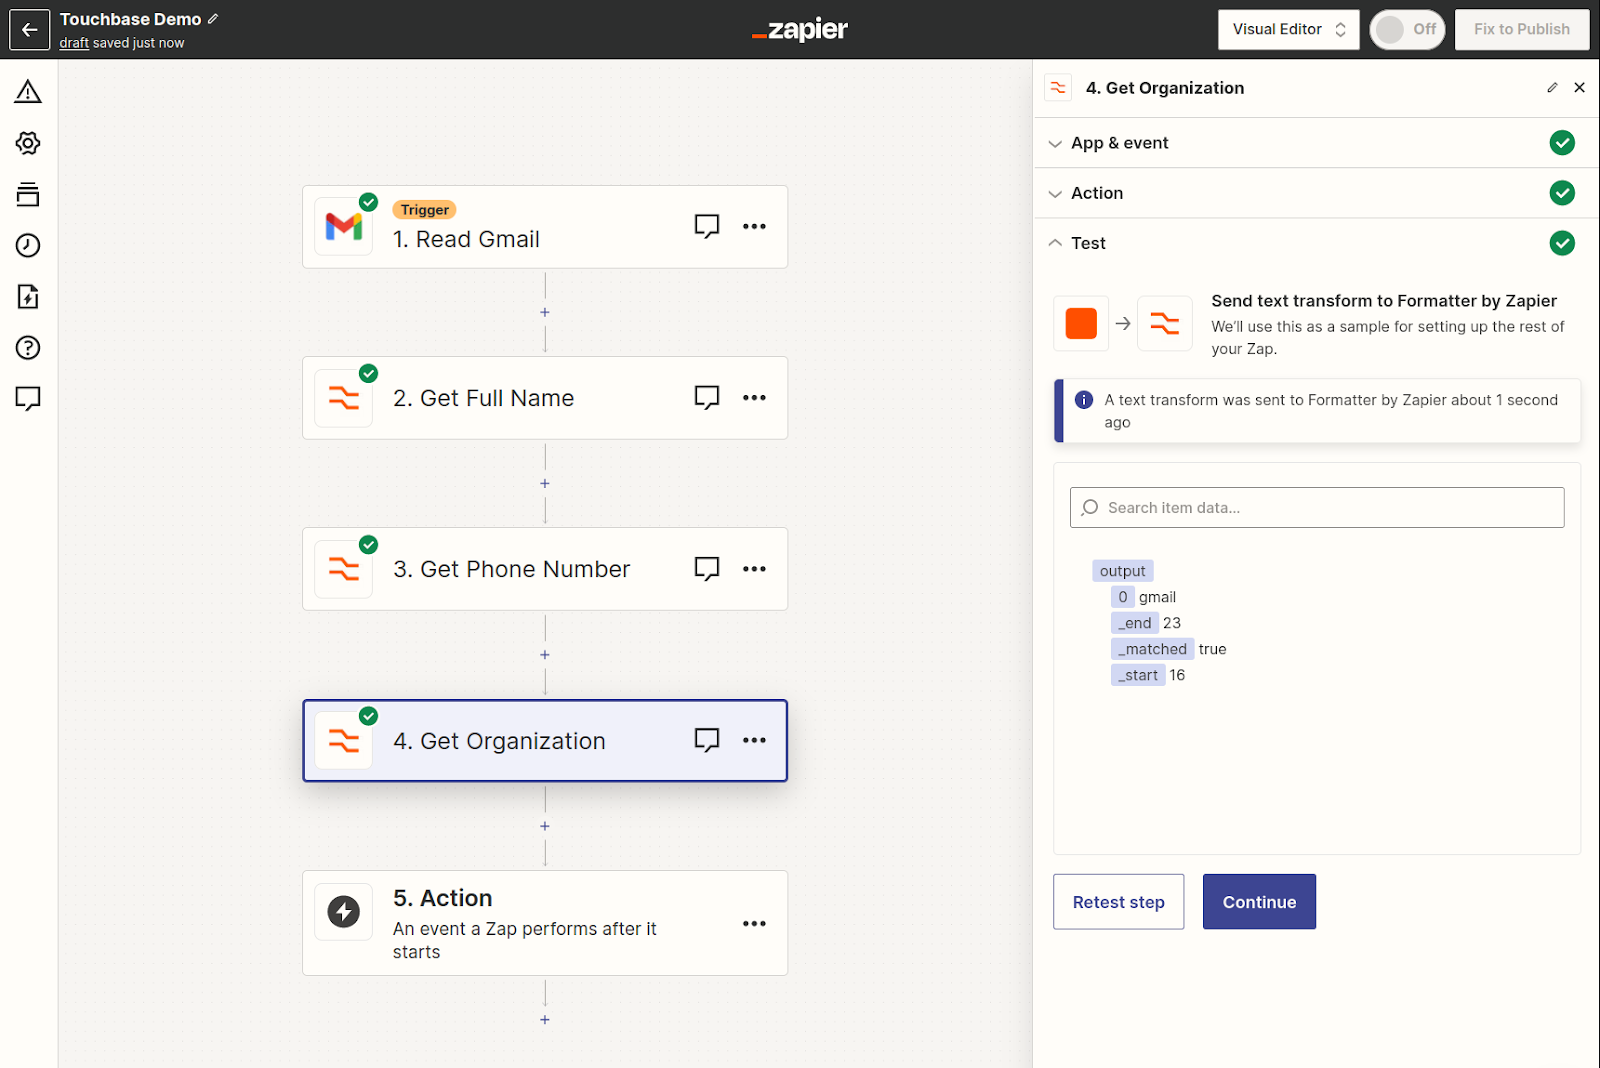
Step 5: Get organization
- After setting up the Gmail trigger, click on the little + sign to add a new step to your workflow and choose "Formatter" by Zapier as the next action app.
- You can call this app whatever you want to but we will call it “Get Organization”.
- For the action event, select "Text".
- In the "Transform" section, select "Extract Pattern".
- Now getting the organization of the lead is a little bit tricky because Zapier semantically does not understand the email. Therefore, we will do some pattern matching to extract the domain name of the lead’s email which resembles the organization of the lead. So, as the pattern, go ahead and paste the following pattern; @([a-zA-Z0-9\-]+)\.
- Leave the rest as default values and click continue.
- Then, go ahead and run the test and see if you get a similar output.
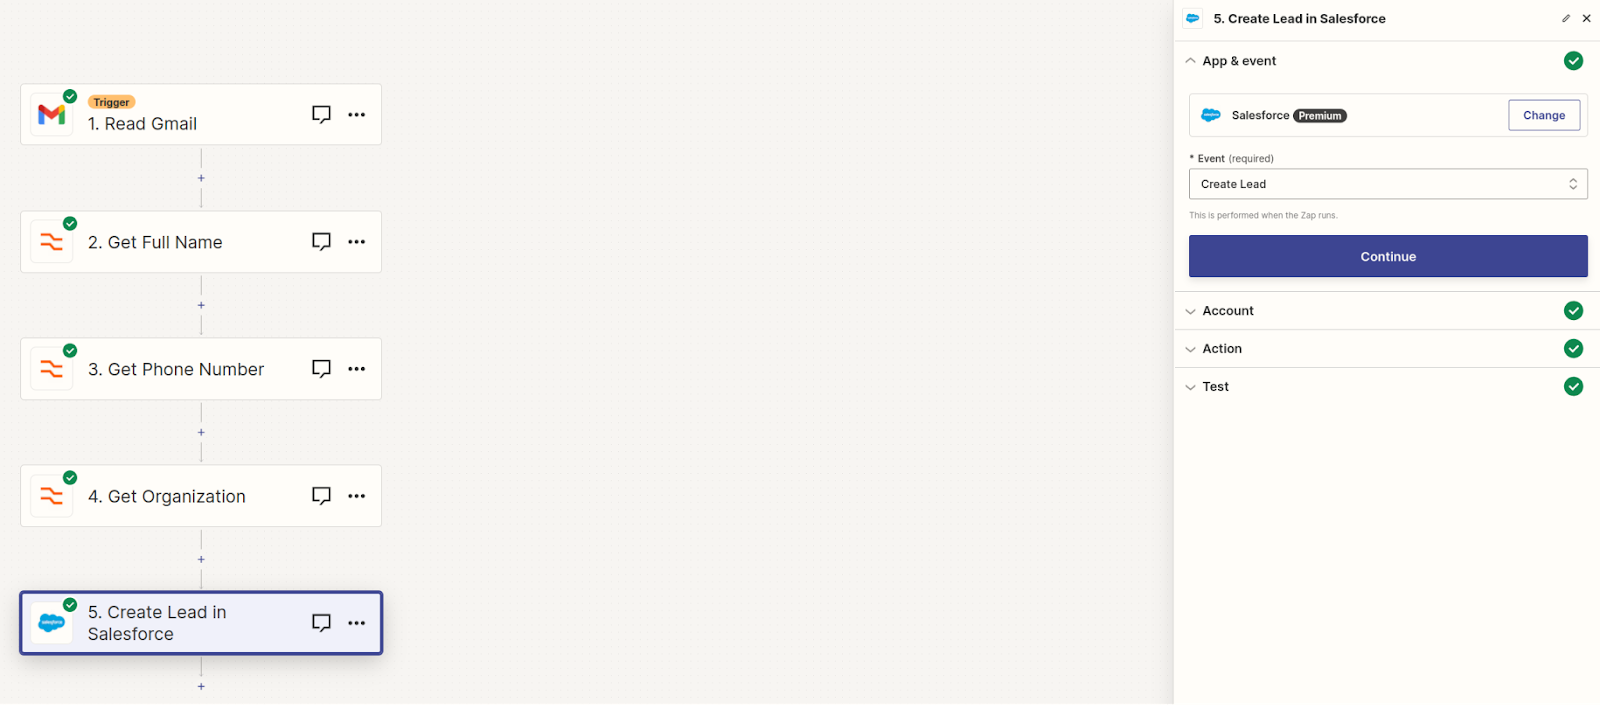
Step 6: Setting up Salesforce CRM to Store Details
- After extracting the details, search for and choose "Salesforce" as the app for the “Action” step.
- Choose the action event "Create Lead".
- Connect your Salesforce account by following the on-screen instructions.
- Set up the Salesforce action:
- For "Choose a Salesforce Object", select "Contact" or another relevant object.
- Then, map the data you have processed using Formatter. When you click on the Action Fields, you will see the Output options of the Formatters you have used so far. If you have run the tests correctly for all the components of the workflow, you will see the corresponding pieces of data alongside the Output(s) available:
- Map the “Last Name” field to “Get Full Name” Output 1.
- Map the “First Name” field to “Get Full Name” Output 0.
- Map the “Organization” field to “Get Organization” Output 0.
- Map the “Phone Number” field to “Get Phone Number: Output.
- Head over to your Salesforce CRM and make sure you are logged in. Then, come back to Zapier.
- Lastly, click "Continue" and then "Test & Review" to ensure data is being sent to Salesforce correctly. You will get the following screen if things go smoothly.
And the lead will be added to your Salesforce CRM as below.

Step 7: Activating the Workflow
- Once you're satisfied with the setup and the tests, turn on your Zap by clicking the Publish switch at the bottom of the Zap editor.
You should get the following view when the Zap is correctly published.

Is Zapier worth it?
Now, if you feel like this is a lot of work, you are not alone. This is just a simple workflow, this will get a lot more bigger, and convoluted if you want to extract more complex information. Further, you’d have to add separate workflows for outbound emails, or for other channels like social media for instance. So, imagine the hassle you have to put yourself through for that. Not to mention that you have to maintain these workflows if your teams make changes to their sales strategies. Let’s pretend that you are willing to get through all of that because the gains are high enough, but remember that pattern matching can get you so far. For example, if you want to extract a complicated piece of information like where the lead learned about your company from, it will be really difficult to implement that in Zapier.
There are also economic ramifications to consider. You will pay about $300/mo per user for Salesforce and $700/mo for Zapier. Instead, you can delegate all of these CRM automation processes to Touchbase CRM for $50/ mo per user. Touchbase CRM uses the latest developments in AI called Large language models (like ChatGPT) to tap into your emails, phone calls, social media, or any other sales channels and automatically update the CRM for you. It will have human-like accuracy even for complex fields like lead HQ address, lead source, etc. because our technology semantically understands your customer interactions. If you are intrigued, visit trytouchbase.com and book a demo.


